Account setup and choosing the right plan
Signing up is straightforward: create an account with email (or OAuth), confirm the verification link, then open your account settings to complete the basics — connect WordPress (plugin or API key), set your default author and categories, choose timezone and scheduling preferences, and add billing/contact details. Before you publish, customize the writer/post templates and default SEO fields so the poster and scheduler start creating correctly for your site; these initial settings are what save you time once automation kicks in. ⏱️ 9-min read
Trafficontent’s plans scale by monthly usage (usually measured in words and/or post slots): Starter/Free covers hobby bloggers with low monthly posts, Pro fits regular, SEO-driven bloggers or small teams who publish frequently, and Agency is geared to multi-site setups and client work with larger or custom quotas and team seats. Match your plan to expected monthly output (occasional 10–20 posts = Starter, regular daily/weekly publishing = Pro, multiple sites/clients = Agency). You can switch plans from your account page (check the pricing/billing FAQ for upgrade/downgrade timing) and contact support for custom limits or a trial if you need to test scheduling and poster behavior on your WordPress sites.
Connecting your WordPress site securely
Install the Trafficontent connector from your WordPress dashboard (Plugins → Add New → search “Trafficontent” or upload the ZIP from your Trafficontent account), activate it, then paste the API key or connect via the plugin’s OAuth flow in Trafficontent → Settings. For API-only setups, generate an API key in your Trafficontent account and enter your site URL and key in the portal; the plugin or API connection will request permission to create, edit and schedule posts so the service can act as your poster and scheduler.
Make sure the connecting user has publishing permissions – ideally an Editor or Administrator role – and that the plugin can access the WordPress REST API. Verify Site Health (Tools → Site Health) shows no REST API or loopback errors, and confirm Permalinks are set to “pretty” so scheduled posts and cron tasks run correctly.
Common failures: an invalid or missing SSL certificate will cause API calls to fail (switch to HTTPS with a valid cert), security plugins or .htaccess rules can block the REST API (whitelist Trafficontent or disable restrictive rules), and restrictive user-role settings or custom capability plugins can prevent publishing (grant proper capabilities or use a higher-role account). If something still fails, check Site Health → Info → REST API and your browser console for CORS/401 errors, then contact Trafficontent support with the error details and your site URL for faster troubleshooting.
Content sources: AI drafts, human writers, and imports
Trafficontent gives you three practical content sources: AI-generated drafts, ordering from human writers, or uploading/importing your existing posts. AI drafts are the fastest and lowest-cost option—great for bulk blogging, testing topics, or generating outlines that you edit for tone and facts. Ordering from writers costs more but delivers higher-quality, more reliable SEO and conversion copy for pillar pages, product/sales posts, or anything that needs subject-matter expertise. Importing existing posts is ideal when you’re migrating a site or repurposing content and want to save time while preserving or improving current SEO value.
Choose by quality, cost, and SEO needs: use AI when velocity and low price matter but plan an editorial pass to add E‑E‑A‑T, links, and keyword targeting; hire writers when you need authoritative, publish-ready posts that will rank and convert; import when you already have decent content that needs cleanup or scheduling. Pricing follows that pattern—AI is cheapest, human writers are pricier—so balance budget against the pages that drive traffic and sales. After creation or import, Trafficontent’s poster/scheduler connects to your WordPress account so you can automate posting, set publish dates, and keep a steady flow of traffic-focused posts.
Practical rule of thumb: use AI for volume and experiments, commission writers for cornerstone and revenue-driving pages, and import to fast-track migrations or refreshes—but always run a final SEO pass (meta, internal links, canonical tags) before scheduling. You can also start with AI drafts and upgrade key pages with professional writers later, which helps you save money while prioritizing the content that matters most for traffic and conversions.
Writing, editing and SEO configuration in the editor
Inside Trafficontent’s in‑app editor you can treat a draft like a native WordPress post: edit the body, set the title at the top and tweak the slug in the permalink field, add a concise meta description in the SEO panel, and use the formatting toolbar to enforce a clear heading structure (H1 → H2/H3). Add your target keywords in the focus‑keyword box, assign categories and tags in the taxonomy sidebar, and attach a featured image via the media uploader. Save drafts, preview, then use the built‑in poster/scheduler to publish or queue the post to your WordPress site so the content and scheduling automation stay tied to your account and profile settings.
To preserve SEO during import: keep original slugs when possible (or set 301 redirects if you change them), retain heading hierarchy and H1 as the main title, carry over meta descriptions and canonical tags, and preserve image alt text and filenames. Verify internal links point to correct URLs after transfer, confirm the featured image is set on WordPress, and run a quick SEO plugin check (Yoast/Rank Math) post‑publish to catch missing meta, schema, or noindex flags. These small steps prevent traffic loss and ensure your automated posts continue to perform.
Scheduling posts and using the calendar & automation rules
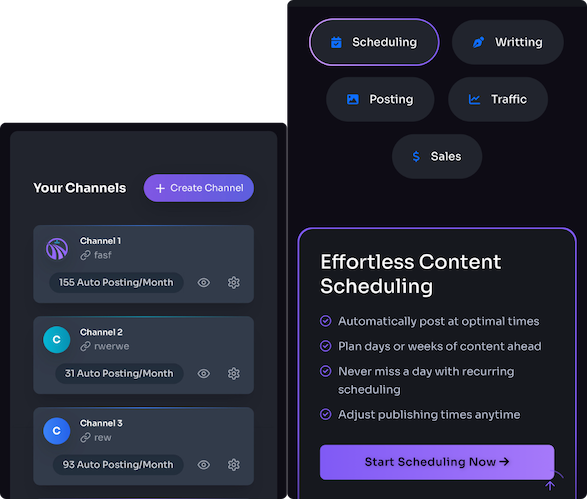
To schedule a single post in Trafficontent, open the post and choose a publish date/time—you can push it straight to WordPress as a draft or set it to publish automatically. For bulk scheduling, select multiple items in the scheduler view or import dates via CSV/multi-select, then apply a pattern or offset so a batch of posts lands across your calendar without manual edits. Mind the timezone: Trafficontent applies your account timezone to scheduled times (check the scheduled-post preview against your WordPress site timezone) so posts publish when you expect them to, not a few hours off.
The visual calendar shows color-coded statuses and lets you drag-and-drop posts between days, filter by writer/source, and spot gaps in your publishing flow. Use the automation rules to maintain a steady posting cadence—set daily/weekly limits, create time-slot templates (for example, morning 9:00 AM and evening 6:00 PM), and define recurring posting rules (every X days, weekdays only, end date). These templates and cadence controls keep content consistent, reduce manual scheduling, and ensure your WordPress posts are spaced to maximize traffic and SEO impact.
Publish workflow, previewing, and error handling
When Trafficontent creates a post on your WordPress site it preserves a clear preview path: new items are first saved as Draft so you can review in the WordPress editor or open the WP preview URL. You can choose whether Trafficontent publishes directly to your live site or to a staging instance for QA; when you schedule publication the tool sets the WordPress post status accordingly so the lifecycle is explicit — draft → scheduled → published — and the built‑in scheduler/auto‑poster handles the timed transition without you having to re‑save content or disrupt SEO metadata added by the writer or poster automation.
If a publish attempt fails, Trafficontent surfaces that immediately in the app and via your chosen notifications (email and in‑app alerts, with optional webhook integrations if configured). The system logs the API responses and timestamps so you can see whether the failure was an auth issue, rate limit, or plugin conflict; there’s an automatic retry policy for transient errors plus a manual retry button and a link to edit the draft in WordPress if content adjustments are needed. If problems persist you can update your account/API credentials or contact support from the project view — nothing is lost in the queue and the logs make troubleshooting straightforward.
Team management, profiles, billing and integrations
Trafficontent lets you invite collaborators with clear, role-based permissions — assign Admin for account control, Editor for publishing and scheduling, Writer for drafting, and a lightweight Poster role if you only need someone to push content to WordPress. Roles control who can publish live posts, change scheduling, or edit billing info; use the author dropdown in the composer or the account profile menu to switch the active author profile so your WordPress posts show the correct byline, bio and avatar when published.
Billing and invoices are handled from the Account > Billing area: add or update the billing contact and payment method, manage seats or plan tiers, and download PDF invoices for any billing period. Keep billing ownership separate from content admins if you want to limit who can change subscriptions or add seats, and check plan limits before scheduling large batches of posts to avoid interruptions.
Close the content-to-promotion loop by connecting analytics and schedulers: link Google Analytics and Search Console to pull traffic and keyword signals into drafts, and integrate social tools (Buffer, Hootsuite, native Facebook/LinkedIn connectors or Zapier) to auto-schedule promotional posts. Use the WordPress poster plugin or API integration to publish scheduled posts directly, ensure OAuth tokens are valid, and add UTM templates in your scheduler so every post delivers measurable traffic back to your site.
Pricing trade-offs, common pitfalls and alternatives
Trafficontent shines when you need volume: it can write and queue up many WordPress posts fast, and the built‑in scheduler/poster saves hours compared with manual publishing. The trade‑off is that lower‑cost plans often deliver generic copy that needs editing, while higher tiers improve voice and research at a noticeable price jump. Automation is handy but not bulletproof—missed cron runs, image upload failures, author/profile mismatches and occasional plugin compatibility quirks (caching or security plugins, older WP versions) are the most common causes of failed publishes. Plan to spot‑check first runs and keep a short manual QA pass in your workflow so SEO and brand voice don’t slip.
Quick fixes: reconnect the Trafficontent account/API in plugin settings; clear cache and temporarily disable conflicting plugins; confirm your WP cron or set an external cron job; verify author profile and category mappings before publishing; re‑upload or reassign missing images and re‑run the poster; update the plugin and WordPress to the latest compatible versions; contact Trafficontent support with a post ID if a scheduled post fails. If Trafficontent isn’t a fit, consider alternatives like Wordable for bulk DOC-to‑WP publishing, Zapier/Airtable/Google Docs automations for custom pipelines, or editorial tools such as CoSchedule/Nelio Content/PublishPress for stronger calendar and workflow control. For migration, export content via the WordPress XML exporter (or CSV for drafts), download and rehost images, map authors and categories on the new system, pause automated posting while you test, then run a small batch import and verify permalinks and SEO meta before switching off Trafficontent.