Set clear goals, KPIs and content-to-conversion mapping
Decide what “autopilot” actually means for you: a traffic lift, more organic conversions, or cold hard dollars saved on ads. Pick one primary goal and make it numeric — for example, “Save $2,000/month in ad spend by driving purchases from organic blog posts.” Track it with GA4, Shopify Analytics, and Google Search Console so you can prove the savings (or confess to your boss). Keep E‑E‑A‑T front of mind for YMYL topics: author bios, sources, and clear citations matter even when you’re automating content with tools like Trafficontent’s Auto Blog Writer and SEO Optimizer PRO. ⏱️ 11-min read
Choose three measurable KPIs and commit: sessions, conversions, and revenue‑per‑post. Set realistic targets (e.g., +30% sessions, +15% conversions, $X revenue per post) and tag every link with UTMs so you can attribute outcomes. Automate the repetitive stuff — Auto Blog Poster and Auto Scheduler push content and timing; Channel Manager distributes it. Measure, tweak, repeat. Think of it as roasting a brisket: low and slow automation, not a microwave miracle.
- How‑to → conversion action: add‑to‑cart or “how‑to kit” product bundle purchase. Goal: drive product page views and add‑to‑cart events tied to the article.
- Product roundup → conversion action: direct buy (primary) or wish list/signup (secondary). Goal: increase clicks-to-product and revenue per post.
- Comparison → conversion action: email capture for a buyer’s guide + targeted promo. Goal: email conversions and tracked purchases from that cohort.
Choose an automation stack: plugins, AI models and orchestration
Pick concrete tools that actually talk to each other: use Trafficontent (Auto Blog Writer + Auto Poster + Auto Scheduler + Auto SEO) to draft, schedule and push posts; pair that with an LLM like OpenAI’s GPT-4/4o or Anthropic Claude for high-quality generation and voice control. For on‑page SEO, add a content-scoring tool—Surfer or SEO Optimizer PRO—and a WordPress SEO plugin like Rank Math to handle schema, sitemaps, and meta automation. Think of Trafficontent as your caffeinated intern and the LLM as the creative director who doesn’t steal your lunch.
Glue it together with an orchestration platform: Zapier or Make (formerly Integromat) can trigger drafts from product launches, push images to CDNs, or fire a content-review task to Slack. Host on a managed WordPress provider (Kinsta, WP Engine, or Cloudways) and front it with a CDN like Cloudflare so assets and scheduled posts don’t melt under traffic. Before you buy anything, check host cron limits and known plugin conflicts—scheduled posts failing or two SEO plugins fighting each other are the gremlins that ruin autopilot dreams.
Keep E‑E‑A‑T and YMYL in mind: automate drafts, not authority. For medical, legal, finance, or high‑risk pages, route AI output through an expert reviewer, attach an author bio, and keep citations visible. Start small, test on a staging site, and measure results; done right, this stack can cut content ops time dramatically (and help you get closer to that “Save $2000 in ads with Shopify blogs” goal) without turning your blog into a robot manifesto.
Build reusable templates, prompts and editorial playbooks
Build three reusable article templates and teach your AI to follow them like a polite but overachieving intern. For example: a Product Roundup (900–1,200 words: intro, 6–8 short reviews, comparison table, winner), a How‑To (1,200–1,600 words: problem, step-by-step, screenshots, common mistakes), and a Listicle (700–1,000 words: snappy intro, 8–12 items with pros/cons). For each template include a tested AI prompt skeleton: desired tone (friendly, authoritative), exact word count, required headings (H2s and H3s), and sourcing rules like “cite primary sources, link product pages, never invent facts.” Try a copy‑paste prompt: “Write a 1,000‑word how‑to in a friendly, slightly snarky voice with H2s for steps, H3s for tips, include 3 verified sources, and end with a 40‑word author bio and internal links to product pages.” Yes, it’s that specific. No, the AI won’t take your sarcasm personally.
Always bake required fields into the template: author bio (name, qualification, 1‑line credibility statement), sources list (URLs and publication dates), internal links to product pages (e.g. Auto Blog Writer, Auto Blog Poster, Auto Scheduler, Auto SEO) and a dedicated “Citations” section whenever content touches YMYL (health, finance, legal). Add an editorial checklist that enforces E‑E‑A‑T: proof of expertise, experience examples, author verification, and source quality. Think of it as the bouncer for misinformation — strict, has a clipboard, and drinks espresso.
Small, practical tip: keep a master prompt library and version it; when a prompt nabs the tone and SERP rankings you want, freeze it. That consistency is how blogs on Shopify and WordPress go from “sporadic hobby” to “Save $2000 in ads with Shopify blogs – Step‑by‑step guide” material. Want a one‑liner to paste into your automation? Try: “Generate a 900–1,100 word product roundup, neutral tone, include 6 products with pros/cons, link to internal product pages, list all sources, and append a 40‑word author bio and a Citations section for any medical/financial claims.” Rinse and repeat — like a good sitcom, the best bits are produced on a predictable schedule.
Design a human-in-the-loop QA workflow for quality and E‑E‑A‑T
Treat QA like speed limits: annoying until they save you from a crash. Make these checks mandatory before publish:
- Factual verification — add a source URL and one-sentence evidence in a CMS “fact-check” column (no hand-waving).
- Citation matching — confirm each claim links to the cited source and the anchor text matches the source intent.
- Readability — run the draft through Hemingway or Grammarly; target short sentences and 8th–10th grade level.
- Plagiarism scan — use Copyscape or Grammarly Premium (Turnitin if you need academic-level certainty).
- Author sign-off — checkbox, name, and timestamp before it goes live.
For YMYL pieces, add an expert review step and require documented credentials (name, degree, affiliation, link to bio). Automate the gate: failing any check routes the post back to the writer with inline comments. Tools that make this painless: Grammarly Premium (grammar + plagiarism), Copyscape (web plagiarism), Hemingway (readability), and a simple CMS custom field for fact-check notes. And yes, let the human sign off — AI can draft, but a real person should stamp it with their name. No emoji signatures accepted.
Automate scheduling and cross-posting while keeping control
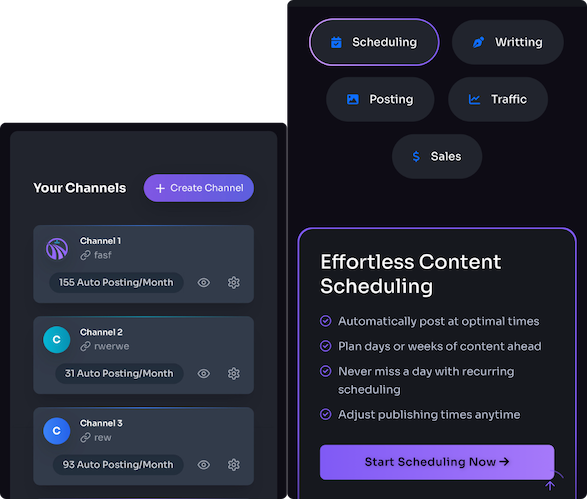
Use an Auto Scheduler (WP-Cron or a real server cron) to stagger evergreen posts instead of dumping them all at once. Practical rule: stagger by category—one how-to, one product piece, one storytelling post per week—then repeat on a 2–4 week cycle so content keeps resurfacing without sounding like a broken record. Queue seasonal batches 4–6 weeks out and mark them with a tag like seasonal-queue. For cross-posting, push short summaries via Zapier (trigger: new post or RSS/WordPress REST API; action: Shopify metafield update or social channel post). If you want product-level automation, connect the Auto Blog Poster or Auto Scheduler (Trafficontent tools) to Shopify via Zapier or a webhook so your storefront shows fresh summaries or featured blog snippets automatically.
Keep a human in the loop with publishing gates: use dark-mode drafts (unlisted, auto-published only after review), set scheduled human review windows (24–72 hours before publish), and build a kill-switch that flips posts back to draft if traffic, CTR, or quality metrics drop by a preset threshold. For YMYL topics or anything affecting finances/health, require manual E-E-A-T checks—author bios, sources, and citations—before anything goes live. Metric automation is easy: feed Google Analytics/Search Console alerts into Zapier or Make, then trigger a webhook to unpublish or flag the post. Think of this setup as autopilot with a pilot: it saves time (and yes, can help you chase that “Save $2000 in ads” goal), but it still asks for your seatbelt when the runway looks sketchy.
Auto-SEO: metadata, schema, internal linking and canonical rules
Use AI templates to auto-generate meta titles and descriptions, then let your SEO plugin do the heavy lifting. Create a title template like "{{post_title}} — {{brand}} | {{primary_category}}" and a description template that hits 120–155 characters, includes the primary keyword and a small CTA (for example, "Learn how to save $2000 in ads with Shopify blogs — step-by-step guide"). Set those templates in Rank Math, Yoast, or SEO Optimizer PRO (Trafficontent’s tool if you use the suite). Enable Product and Breadcrumb schema in the same plugin, and map fields from your product feed: name, price, currency, availability, sku, brand, aggregateRating. That tells Google what your pages actually sell, and yes — structured data is basically your site whispering its résumé to search engines. For YMYL topics or anything requiring E‑E‑A‑T, add a human review step to your template workflow so the AI doesn’t accidentally claim your mattress cures insomnia like an infomercial.
Then automate internal links and canonical rules so blog traffic funnels to the pages that make money. Build a rule like: if post tag contains "how-to" or "best" and product category = "kettlebells", auto-insert the first in-body link to your priority product landing page with anchor text "best kettlebells". Use your plugin’s rule builder or Trafficontent’s Auto Blog Poster/Auto Scheduler hooks to insert a CTA block or first-paragraph link. Set canonicals explicitly: posts canonical to themselves, product pages canonical to the product URL, and don’t let archive pages steal canonical priority. Small rule, big lift — this is how you nudge readers down the funnel without holding their hands the whole way. Think of it as gentle e-commerce matchmaking, powered by smart rules and a little AI charm.
Track impact and prove ad-spend savings with concrete analytics
First, wire up the plumbing so your data stops lying to you. Turn on GA4 and link it to Google Search Console and Google Ads; enable enhanced measurement and export GA4 to BigQuery for later cohort work. Install a server-side container with Google Tag Manager Server (Cloud Run or similar) and send Shopify checkout events via the GA4 Measurement Protocol or Shopify webhooks—server-side events survive ad blockers and give you cleaner conversion matches. Standardise UTMs: use utm_source=organic_blog, utm_medium=organic, and utm_campaign=YYYYMM_slug so every post’s sessions can be tied to conversions. Use Search Console to track impressions and queries for E‑E‑A‑T/YMYL pages; it’s your content’s report card. Think of this like putting a GPS tracker on your blog traffic—no more guessing where those orders actually came from.
Next, measure the money. Calculate CAC as ad spend ÷ paid conversions for a baseline window (three months before the blog program). After your blog is live, attribute organic conversions via UTMs/GA4 and compute CAC again. Monthly ad savings = (CAC_before − CAC_after) × conversions_after—or more conservatively, (baseline CAC × blog-driven conversions) − actual ad spend. Run cohort tests in BigQuery or Looker Studio: build cohorts by acquisition month or by source (blog vs control), wait 60–90 days for conversion signals, then compare conversion rate, average order value, and CAC with simple t‑tests or proportion tests. If your hypothesis is “Save $2,000 in ads per month,” set that as the threshold and test for statistical confidence. Tools that make this painless: GA4, Search Console, GTM Server, BigQuery, Looker Studio, and Shopify’s admin/webhooks. Do it right and you’ll have concrete analytics to show the CFO—along with a cooler story than “we think it helped.”
Ops, monitoring and safe scaling — audits, decay fixes and rollback plans
Do a focused content audit every month — 45–90 minutes is enough if you keep it disciplined. Check Google Search Console and Google Analytics for traffic dips, run a quality‑drift pass with an SEO tool (Trafficontent’s SEO Optimizer PRO, Surfer or Clearscope), and mark posts that need pruning, updating, or redirecting. Set automated alerts (GA custom alerts, GSC email notifications, or a Zapier → Slack flow) for >20% traffic drops or sudden CTR changes so you don’t discover a traffic crater three weeks later. Expect tool costs roughly $50–300/month; a quick human audit can be 1–2 hours/month (~$50–$200 if outsourced). Follow the “Save $2000 in ads with Shopify blogs – Step-by-step guide” mentality: regular audits reduce paid spend over time.
Always assume automated posting will someday misbehave. Have an emergency rollback plan: nightly backups (UpdraftPlus or your host; ~ $70/year for premium), a staging site (managed hosts $15–50+/mo), and a one‑click stop/pause for Auto Blog Poster queues (Trafficontent’s Auto Blog Poster or similar). Keep a simple rollback script or use WP Rollback/Git for theme/plugin versions. Before any big automated push, snapshot the site and export the latest posts — perform a smoke test in staging. These steps turn “uh oh” into “phew” much faster.
If you publish YMYL content, add legal reviews to the calendar. For moderate risk, schedule a legal check every quarter; for high risk or financial/medical pieces, review monthly or whenever you change claims. Legal time runs $200–400/hr typically, so budget $200–1,200 per review depending on depth. Do a full E‑E‑A‑T refresh quarterly: update author bios, add new citations, refresh stats, and reverify expert sources. Treat these ops as preventive maintenance — like oil changes, but for your credibility (and less greasy).